Live records for all Biological Resources Aquatics facilities are maintained in real-time within theWebDB database for animal ethics and regulatory compliance.
General navigation
1. Login to WebDB as instructed.
2. You will arrive to the WebDB landing page.

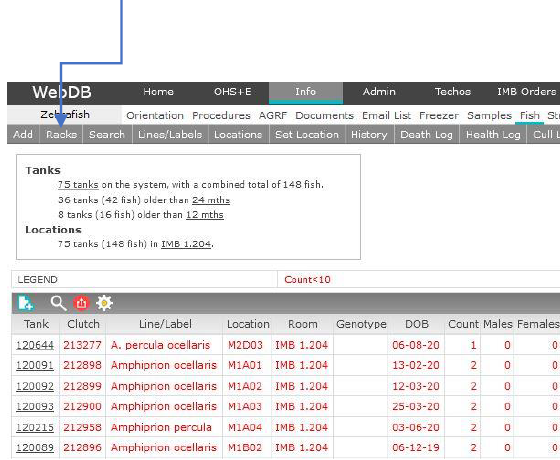
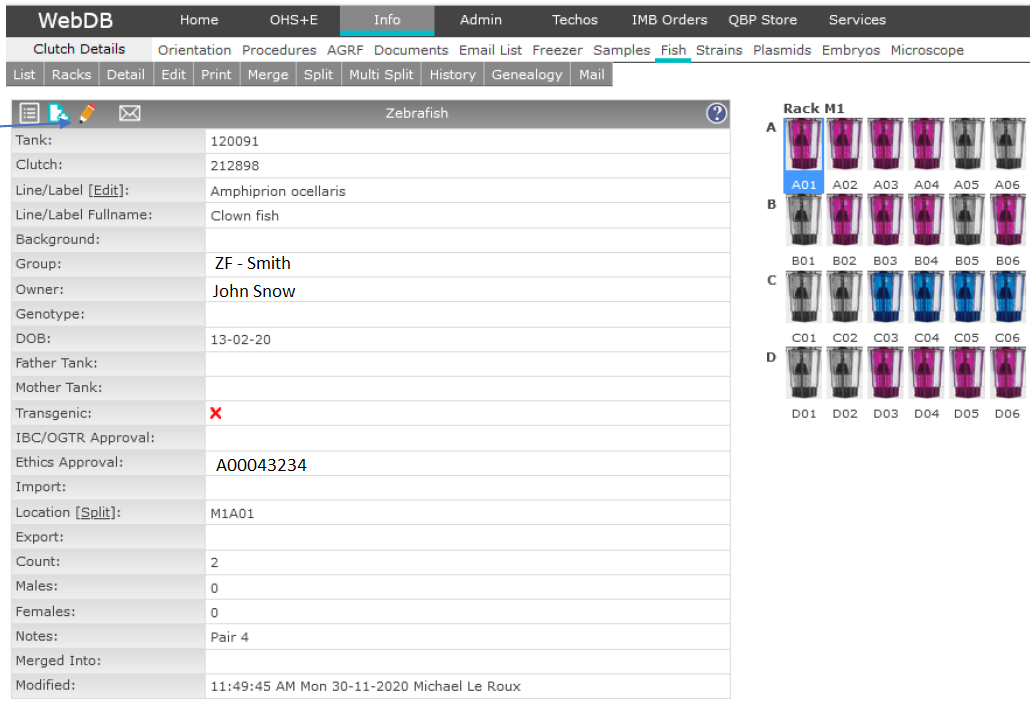
3. From the WebDB home screen, select Info > Fish > Racks. This will provide an overview of UQBR Aquatics Facilities.
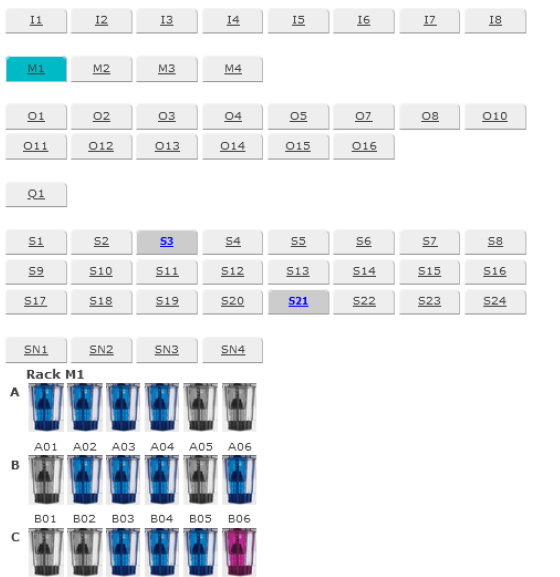
3. Select a rack of interest e.g. M1, this will display tanks allocated to this rack. Racks highlighted in blue belong to you.
- The front of the rack lists tank rows A-B, the rear of the rack lists tank rows C-D.
- Grey tanks are empty.
- Blue tanks are occupied.
- Pink tanks belong to the same use.
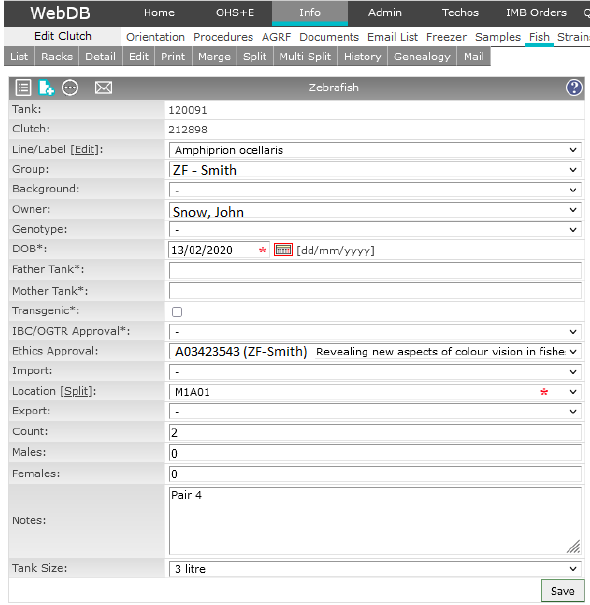
4. Select a tank of interest. The history for the tank will be displayed. Alternatively, select a tank from the Fish home tab by selecing the tank ID Number. Then, select the Pencil icon or Edit tab to edit the tank details.
Add Clutch
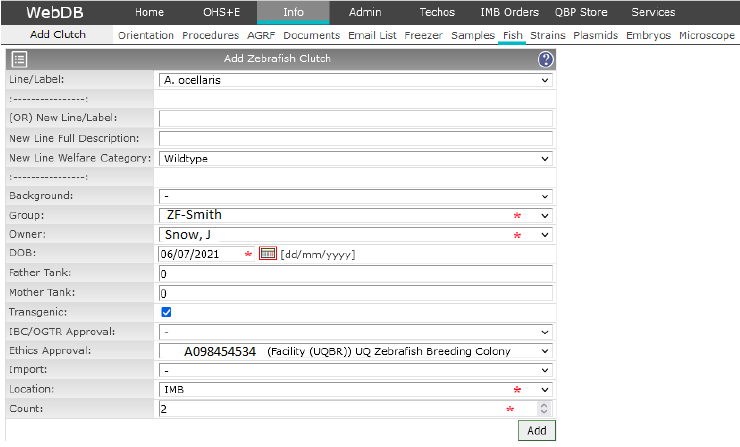
1. From the Web DB home screen select the Info > Fish > Add.
2. Select pre-existing line names, or create a new name.
3. Select wildtype or marker strain (if transfenic/GMO).
The group and owner are pre-loaded.
4. Select DOB - this denotes fertilisation/laid or wild-caught date.
5. Enter mother and father ID if known.
6. If required de-select transgenic.
7. Select IBC permit if a GMO.
8. Select the ethics permit.
8. Change location to room e.g. Seddon, or specific tank location (if known).
9. Enter the number of individuals.
10. Select Add to finalise this entry.
11. After creating an ID label, a notifiction to print will appear, select No.
Interpreting database labels
The label displays all required information for both ethics and OGTR/IBC compliance.
- Line name
- Date of fertilisation
- Clutch number - this is not unique and relates to siblings from the same breeding event
- The tank ID is unique - Individuals may have the same clutch ID, but are housed in different tanks e.g. male/females, het/hom, splitting to reduce density
- Tank ID's can be used to identify individual animals
- The first line of the notes field is printed on the label if present at the time of printing
- Researcher - who the tank belongs to
- Group leader - Research group name.

Splitting tanks
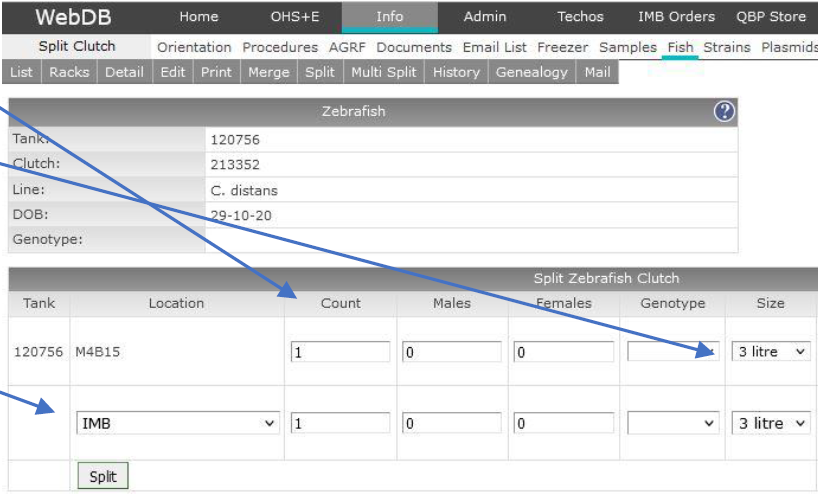
1. Select the tank of interest then select Split at the top tab.

2. The splitting screen will be displayed, the count field is half the original density. Change the count if the split is not even.
3. The tank size is duplicated, change the tank size if required.
4. The location of the new tank is set to the same room, and rack, change if required.
5. Select Split to complete.
6. The new tank will have a unique Tank ID, the clutch number will remain the same.
Merging tanks
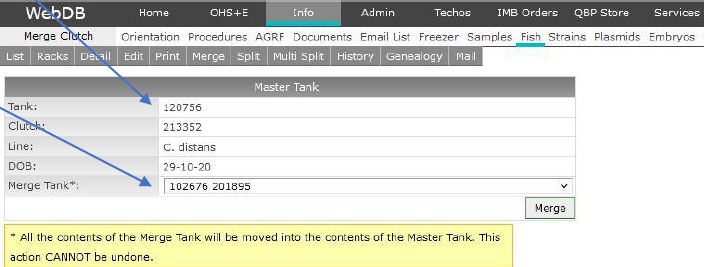
1. Select the tank of interest then select Merge at the top tab. The merging screen will display with the original tank set as the Master tank.

2.Select the tank ID you want to merge INTO this tank.
3. Select Merge to complete. A record of this merge will be displayed in the notes field of the master tank.
4. Discard the old database label of the merged tank. The old merged tank will still be accessible on WebDB.
